


Welcome to the ultimate weekend DIY project for budget-conscious parents. If you want to transform your backyard into an engaging, sensory-rich environment for your children, you do not need to spend thousands of dollars on brightly colored plastic playground sets.
Plastic playsets fade in the sun, take up massive amounts of visual space, and often dictate exactly how a child should play. A natural outdoor play space built from logs, stumps, and boulders offers an affordable, beautiful, and open-ended alternative.
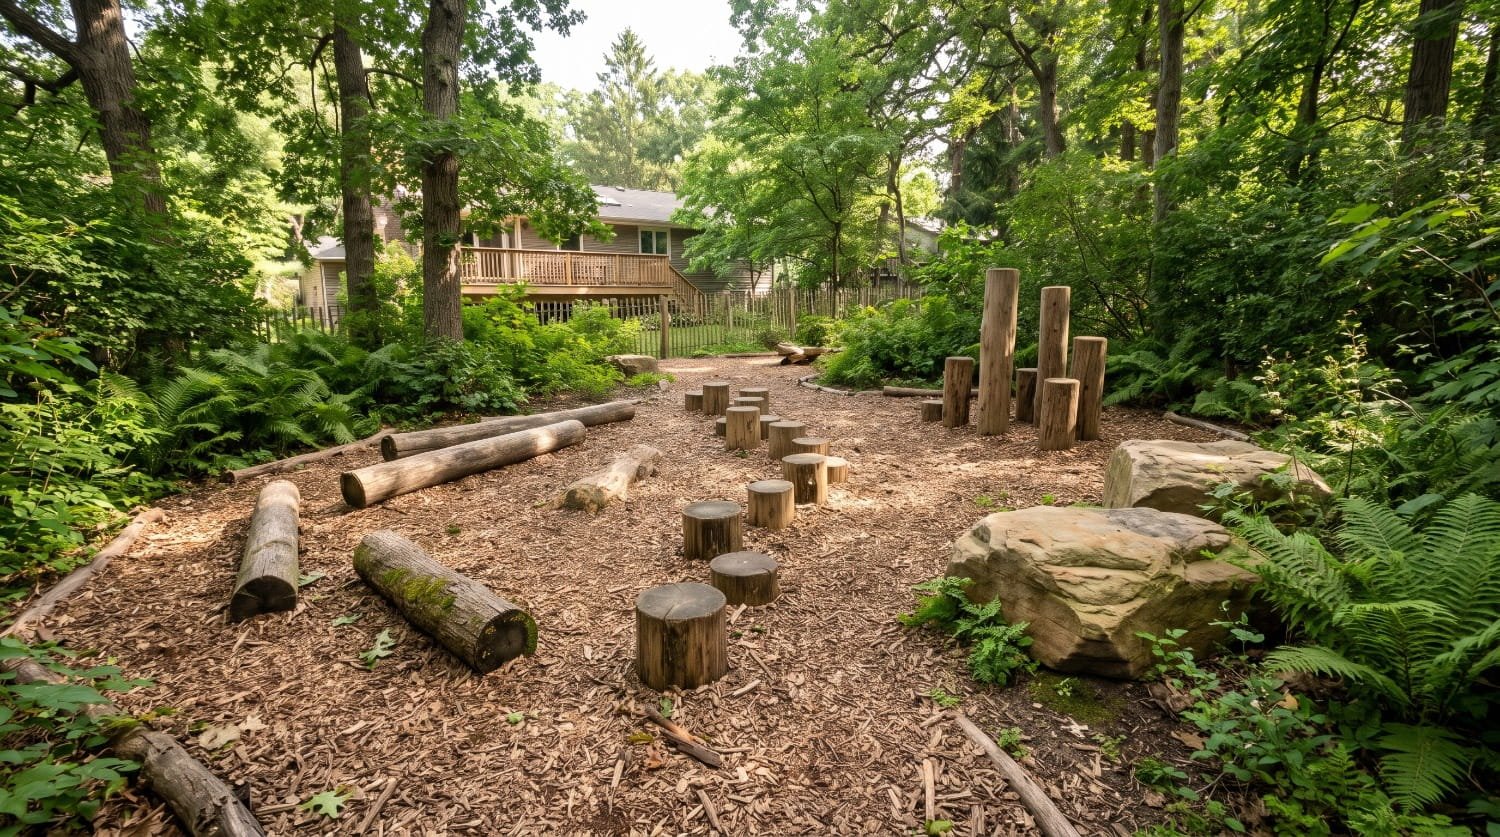
By utilizing raw, natural materials, you create an environment that blends seamlessly with your landscaping while offering massive developmental benefits for your kids. Natural playgrounds challenge a child’s balance, spatial awareness, and gross motor skills.
A boulder is not just a rock; it becomes a mountain to conquer. A stump is not just a piece of wood; it becomes a launching pad, a seat, or an island over a floor of hot lava.
This guide will walk you through exactly how to build a natural play area from scratch. We will cover how to source free and cheap materials, the essential preparation required to make the wood safe, and the step-by-step engineering needed to lock everything firmly into the earth so your children can play safely.
The Philosophy and Benefits of Natural Play Spaces

Before digging holes and moving heavy rocks, it is important to understand why this project is worth your weekend. Natural play spaces are backed by decades of childhood development research. They provide benefits that rigid plastic structures simply cannot replicate.
Sensory and Tactile Engagement
Nature provides endless textures. The rough grip of sandstone, the smooth sanded grain of a hardwood log, and the soft cushion of playground mulch offer incredible tactile feedback. This sensory input helps develop a child’s nervous system, teaching their brain how to process different physical feelings and adjust their grip and stance accordingly.
Advanced Gross Motor Skill Development
When a child climbs a standard ladder on a plastic swingset, the steps are perfectly even. Their brain goes on autopilot. In a natural play space, no two stepping stumps are the exact same height. The gaps between logs vary. The handholds on a boulder are asymmetrical. This forces children to use proprioception, which is the body’s ability to sense movement, action, and location. They have to actively calculate risk, shift their center of gravity, and engage their core muscles to navigate the space.
Open-Ended Imaginative Play
A plastic steering wheel on a playset tells a child they are driving a car. A cluster of boulders and logs tells a child nothing, which means it can be anything. One day it is a pirate ship, the next it is a castle, and the next it is a wilderness survival camp. Unstructured play is the foundation of creative problem-solving.
How to Source Free and Low-Cost Materials
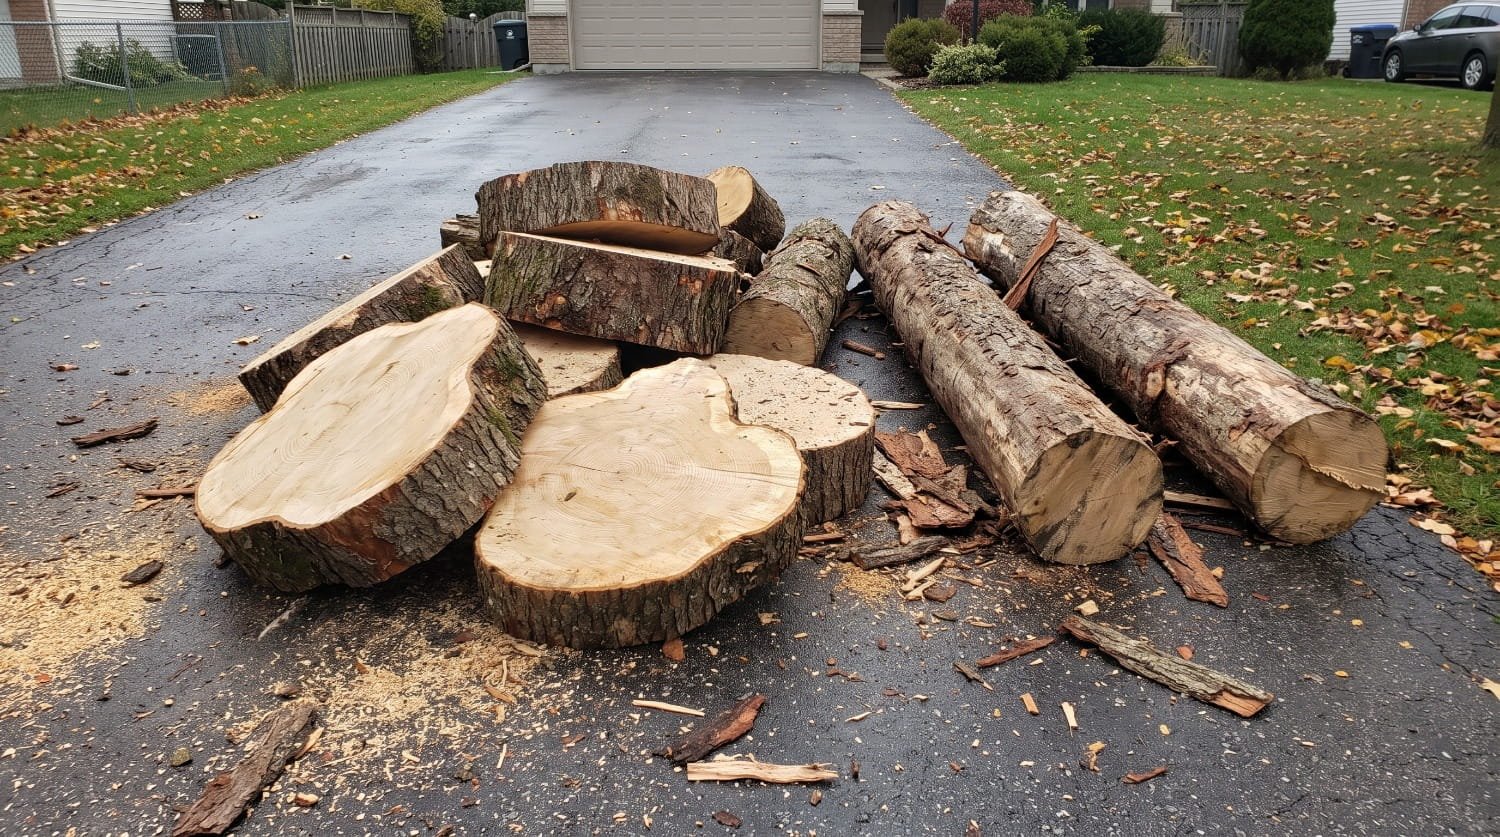
The greatest advantage of this weekend DIY project is the budget. The earth creates your building materials for free; you just have to know who to ask and where to look. You can gather almost everything you need without stepping foot inside a big-box home improvement store.
Sourcing Untreated Hardwood Logs and Tree Rounds
Your main building materials will be heavy logs and tree rounds. You want to strictly look for untreated hardwood. Hardwoods like oak, maple, hickory, and locust are incredibly dense. They will withstand years of rain, snow, and muddy boots before they begin to rot. You must avoid softwoods like pine or spruce, as they decompose rapidly when exposed to ground moisture and will turn to mush within a year or two.
You also must avoid chemically treated wood like old railroad ties or utility poles. These are soaked in creosote and toxic preservatives that you absolutely do not want children touching or climbing on.
To get free untreated hardwood, bypass the lumber yard and go straight to the source: local tree-trimming services and arborists.
- Search for local tree service companies in your area.
- Call them and explain that you are building a backyard nature play area for your kids.
- Arborists pay dumping fees by weight to dispose of the trees they cut down. If you offer your driveway as a free dumping spot, they are usually thrilled to drop off wood for you at no cost.
- Be specific with your request. Ask them for untreated hardwood logs and 12-to-18-inch tree rounds. This 12-to-18-inch diameter is the perfect size for small feet to safely stand on without the wood tipping over.
Selecting Sandstone or Granite Boulders
Boulders anchor the play space and provide excellent climbing challenges. You are looking for rocks that are large enough that a child cannot move them, usually weighing between 150 and 300 pounds.
When choosing rocks, seek out sandstone or granite boulders. Sandstone is phenomenal for natural playgrounds because it has a gritty, sandpaper-like texture that offers incredible grip for rubber-soled shoes, even when damp. Granite is incredibly durable, heavy, and provides a classic, rugged aesthetic to your landscaping.
To source these affordably:
- Check local online classifieds like Facebook Marketplace or Craigslist. Homeowners frequently give away large landscaping boulders for free if you are willing to haul them away.
- Visit a local stone yard or landscaping supply center. Buying raw boulders directly from a stone yard is surprisingly cheap compared to buying pre-packaged garden stones. You can often fill the back of a pickup truck with premium sandstone for a fraction of the cost of a commercial playground slide.
Essential Tools and Safety Gear for the Build
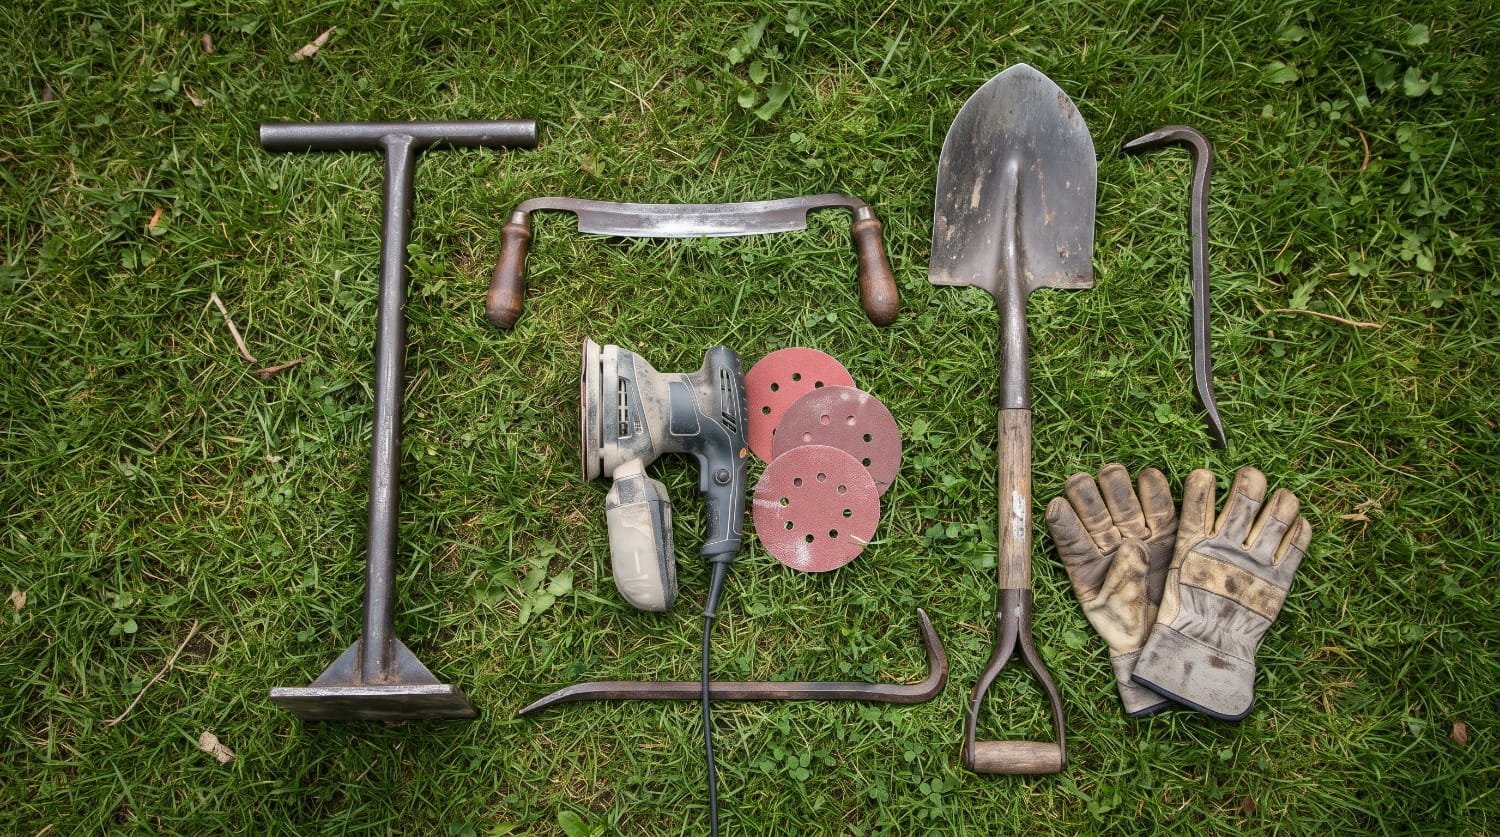
Because you are working with heavy, raw materials, having the right tools will save your back and speed up the weekend build. Gather these items before your wood and stone are delivered.
Tools for Wood Preparation
- Drawknife or Flat Pry Bar: Essential for stripping the loose bark off the raw logs.
- Orbital Sander: Used to smooth out the wood and remove dangerous splinters.
- Heavy-Grit Sandpaper: 40-grit to 60-grit discs will chew through rough wood fibers quickly.
- Chisel and Hammer: Necessary for carving hand and foot notches into the vertical climbing logs.
Tools for Excavation and Placement
- Round Point Shovel: For digging trenches and holes for the logs and boulders.
- Heavy Steel Dirt Tamper: This tool features a flat, heavy steel plate on the end of a pole. It is non-negotiable for this project. You will use it to compact the soil tightly around your logs so they never roll or wiggle.
- Heavy-Duty Steel Pry Bar: Essential for shifting heavy boulders into their final resting places without throwing out your back.
- Wheelbarrow or Hand Truck: For moving the heavy 12-to-18-inch tree rounds from your driveway to the backyard.
Safety Gear
- Heavy Leather Work Gloves: Raw wood is full of massive splinters, and stone will scrape your knuckles.
- Safety Glasses: Required when stripping bark, sanding, and chiseling wood.
- Steel Toe Boots: Highly recommended when moving 200-pound boulders and massive hardwood logs.
Site Preparation and Layout Design
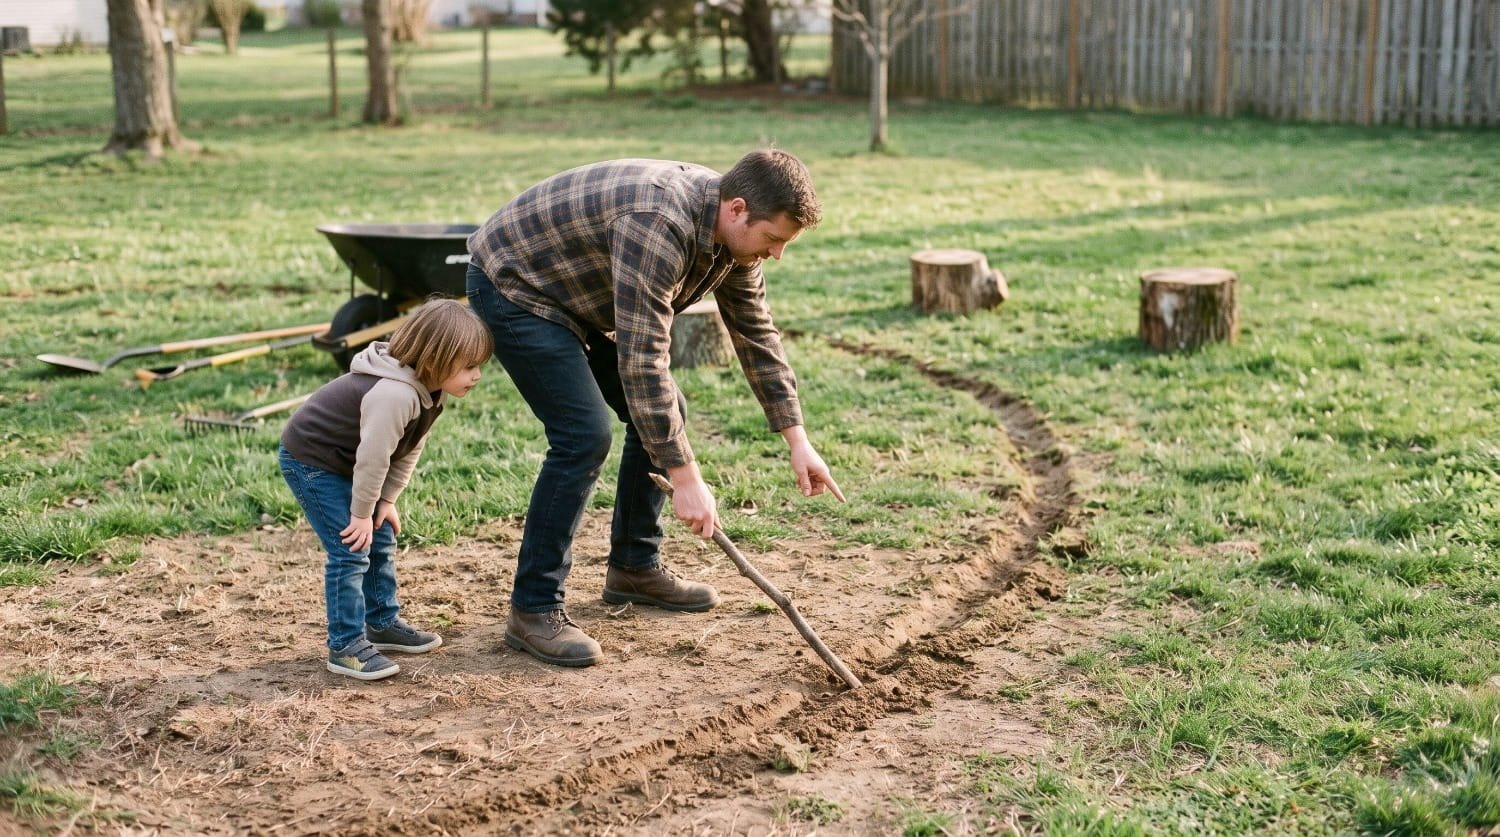
Do not start digging holes until you have a master plan. The placement of your natural playground will dictate how often your children use it and how well it survives the weather.
Choosing the Perfect Location
Look for a spot in your yard that gets a mix of sun and shade. Natural wood and stone can get warm in direct afternoon sun, so the canopy of an existing mature tree provides great natural cooling.
Evaluate the drainage of the area. You do not want to build your playground at the lowest point of your yard where rainwater collects. Sitting water will turn the dirt into mud, sink your boulders, and drastically accelerate wood rot. Choose a level area with good natural drainage.
Mapping the Flow of Play
Children rarely play in a straight line. They run in loops and circles. Design your elements to flow into one another. The horizontal balancing logs should naturally lead toward the winding stump stepping trails, which should eventually deposit the child near the boulders or vertical scaling stumps.
Use eco-friendly landscaping spray paint or lay down garden hoses to map out the exact footprints of the logs, stumps, and rocks before you break ground.
Wood Prep: Stripping Bark and Sanding Splinters
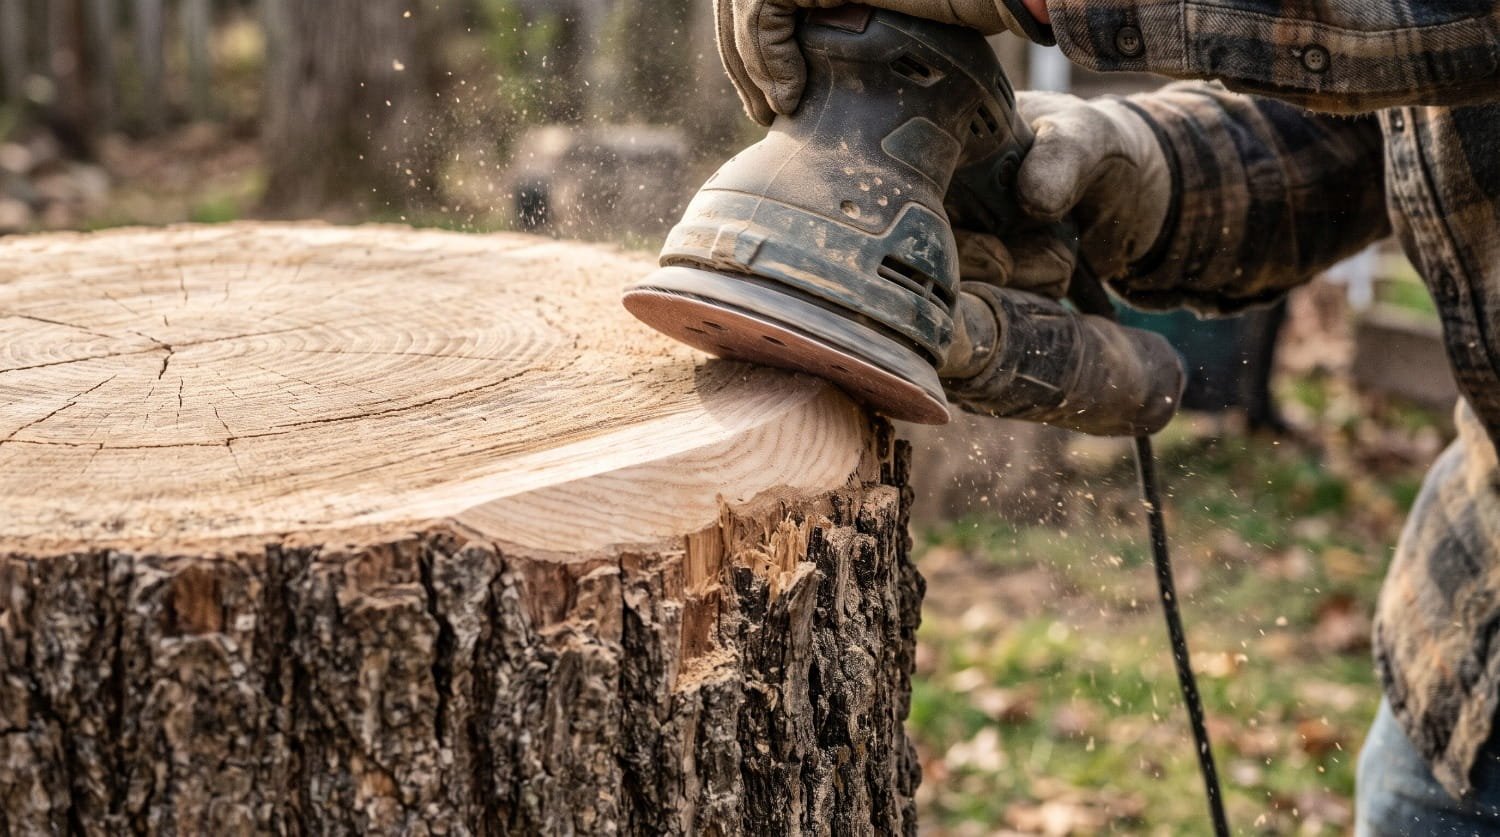
Raw logs fresh from an arborist are not ready for a child to play on. You have to prep the wood to ensure it is safe and long-lasting.
Removing the Bark
Bark is nature’s sponge. If you leave the bark on your logs and tree rounds, it will trap rain and ground moisture against the hardwood. This creates a breeding ground for insects, fungus, and rapid wood rot. You must strip the logs completely bare.
Use a drawknife to peel the bark back toward you. If the wood is freshly cut (green wood), the bark might peel off easily in large strips. If the wood has been sitting for a few months, the bark will be stubborn. Use a hammer to tap a flat pry bar under the bark to wedge it loose from the heartwood. Strip every log and stump until you only see bare hardwood.
Sanding for Safety
You do not need the wood to be as smooth as a dining room table, but you must eliminate all sharp edges and splinters. Equip your orbital sander with 40-grit or 60-grit heavy sandpaper.
Focus your sanding on the top surfaces where children will stand and sit. Pay special attention to the harsh 90-degree edges of the tree rounds. Sand these edges down heavily to create a soft, rounded bevel.
If a child slips and bumps their shin against the edge of a stump, a rounded, sanded edge will only cause a bruise, whereas a sharp, raw edge can cause a deep scrape.
Installing Horizontal Balancing Logs: Prep and Stability Anchoring
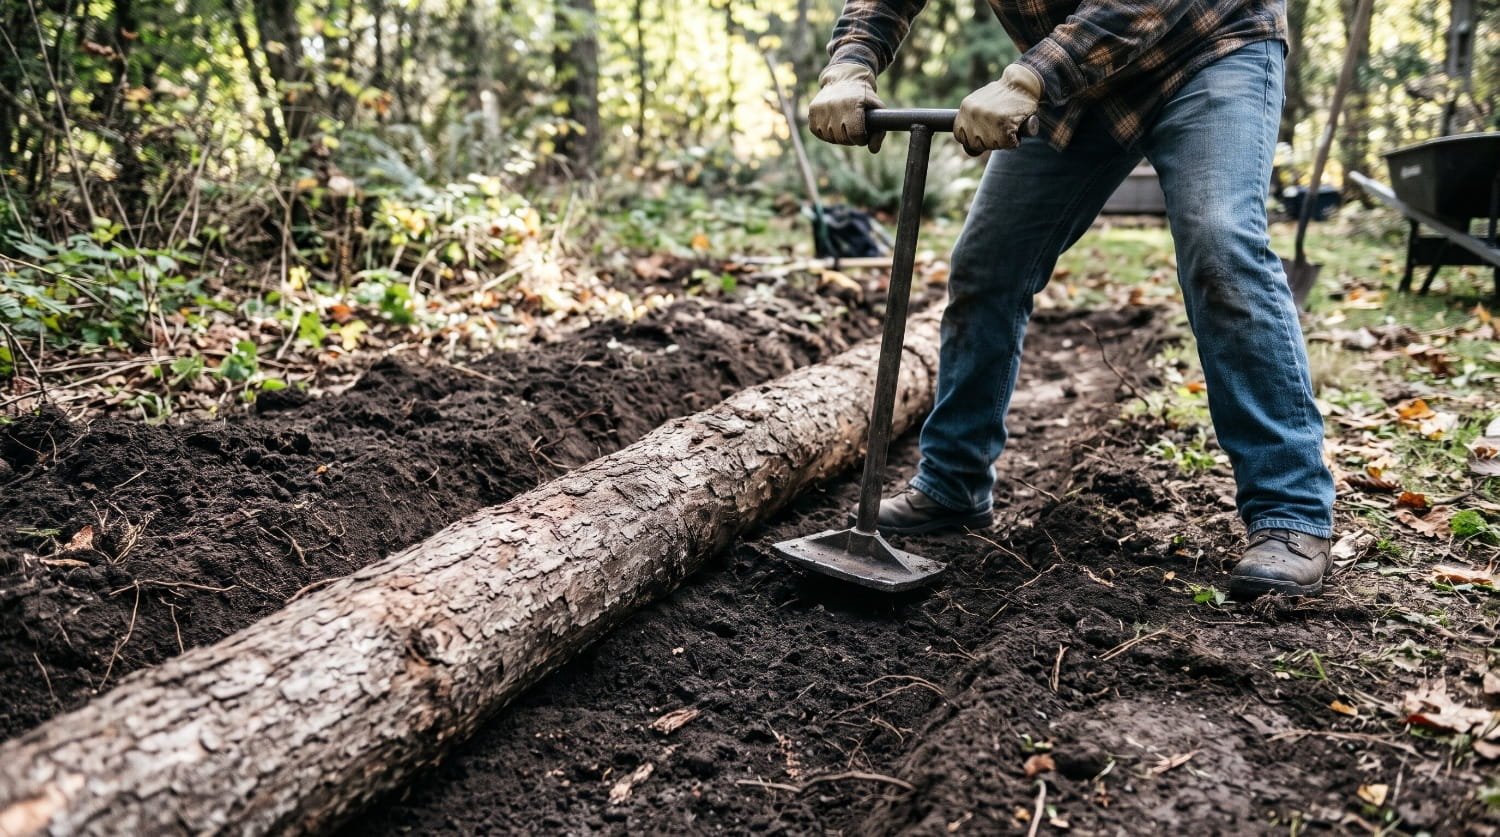
The horizontal balancing log is a classic gross motor skill challenge. Children love walking end-to-end like a tightrope walker. However, a loose log lying on the grass is incredibly dangerous. If a child steps on the edge of an unanchored log, it can quickly roll over, trapping their foot or throwing them backward. You must anchor horizontal logs so they never roll.
Trenching the Wood
Roll the prepped, sanded log exactly where you want it. Take your shovel and trace a line in the dirt down both sides of the log. Roll the log out of the way.
Now, dig a shallow trench within those lines. You need to trench the horizontal logs 2 to 4 inches into the soil. Digging this trench creates a custom-fit cradle that matches the exact contours of the wood.
The deeper the trench, the more secure the log will be, but 2 to 4 inches is the sweet spot for stability without burying too much of the playable surface.
Anchoring with the Dirt Tamper
Roll the log back into the trench. It should sit snugly in the depression. Take the dirt you just excavated and shovel it back along the sides of the log.
Grab your heavy dirt tamper. Vigorously smash the loose soil down against the sides of the log, wedging the dirt tightly into the gap between the wood and the trench wall. Pack it as densely as you possibly can.
Once you have tamped the entire perimeter, test the stability. Stand on the log. Jump on it. Try to push it with your foot. If it shifts or wiggles even a fraction of an inch, add more dirt and tamp it again.
A properly trenched and tamped log will feel as though it is cemented into the earth. It will never roll.
Constructing Winding Stump Stepping Trails
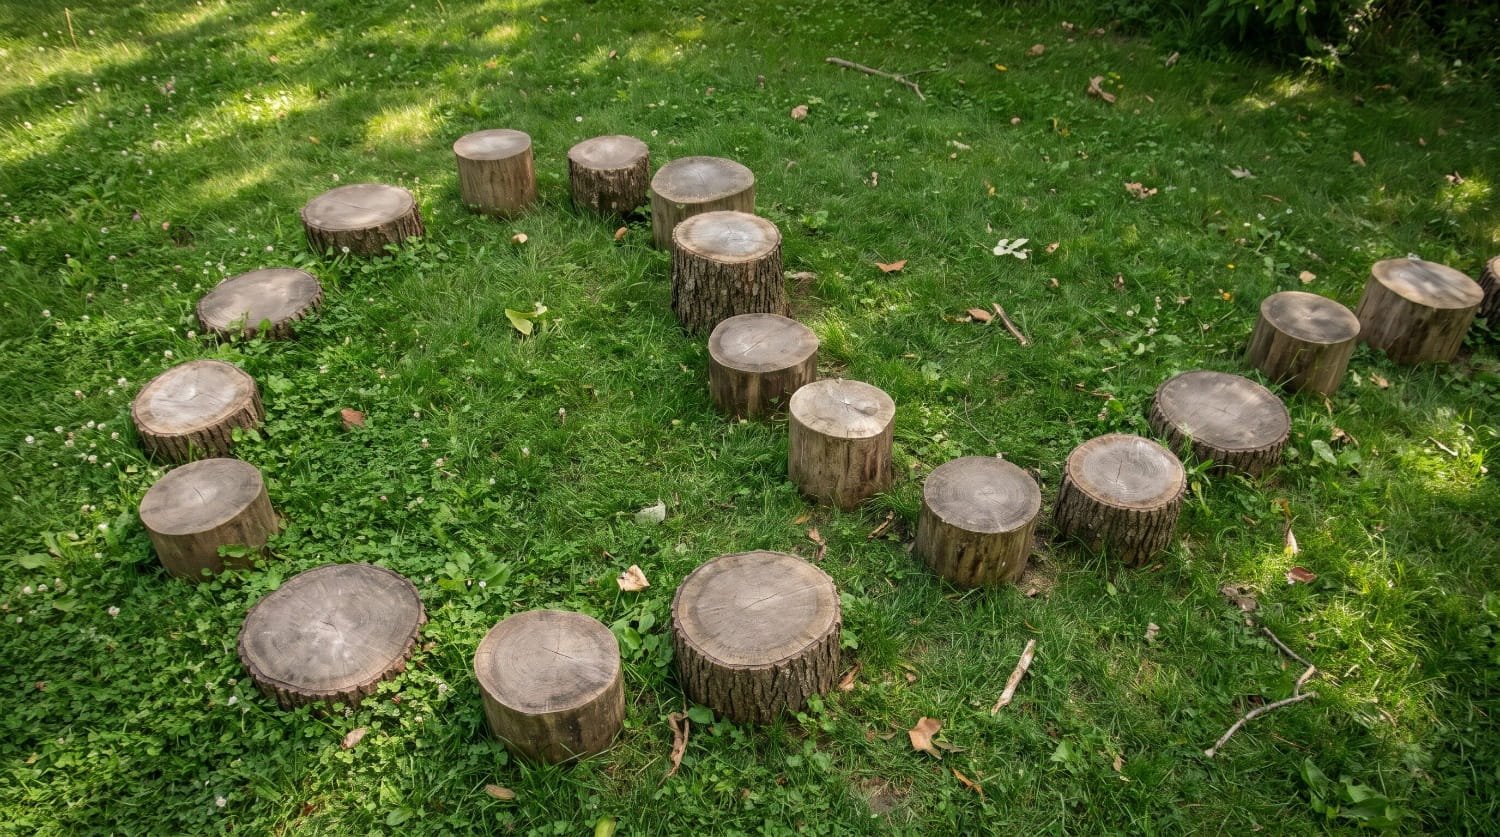
Stump jumping is fantastic for building balance, agility, and turning skills. It requires focus and lower-body coordination. Rather than dropping stumps in a boring, straight line, you will build a dynamic, curved path.
Height and Spacing Specifications
Sort through your pile of 12-to-18-inch tree rounds. You want to map out the tree rounds at varied heights to force the child to step up and step down. Aim to use rounds that sit 4 to 8 inches tall above the ground once buried.
This height range is tall enough to feel like an obstacle, but low enough that a misstep results in a harmless stumble onto the grass or mulch, rather than a dangerous fall.
When placing the stumps, leave 12-to-18-inch gaps between them. This spacing is intentional. A 12-to-18-inch gap is a comfortable step for a tall child, but requires a slight leap or a wide, balancing stretch for a toddler. It accommodates multiple age groups perfectly.
Digging and Seating the Stumps
Do not just place the tree rounds on top of the grass. They will wobble and eventually tip. Map out your stumps in a curved, winding path. A winding path forces the child to turn their torso and adjust their line of sight, which builds advanced spatial awareness.
For each stump, dig a hole roughly one to two inches deep, matching the exact diameter of the round. Ensure the bottom of the hole is perfectly flat so the stump sits level. Drop the 12-to-18-inch tree round into the hole. Backfill the edges with dirt and use your tamper to lock the stump in place.
Building the Vertical Scaling Stumps
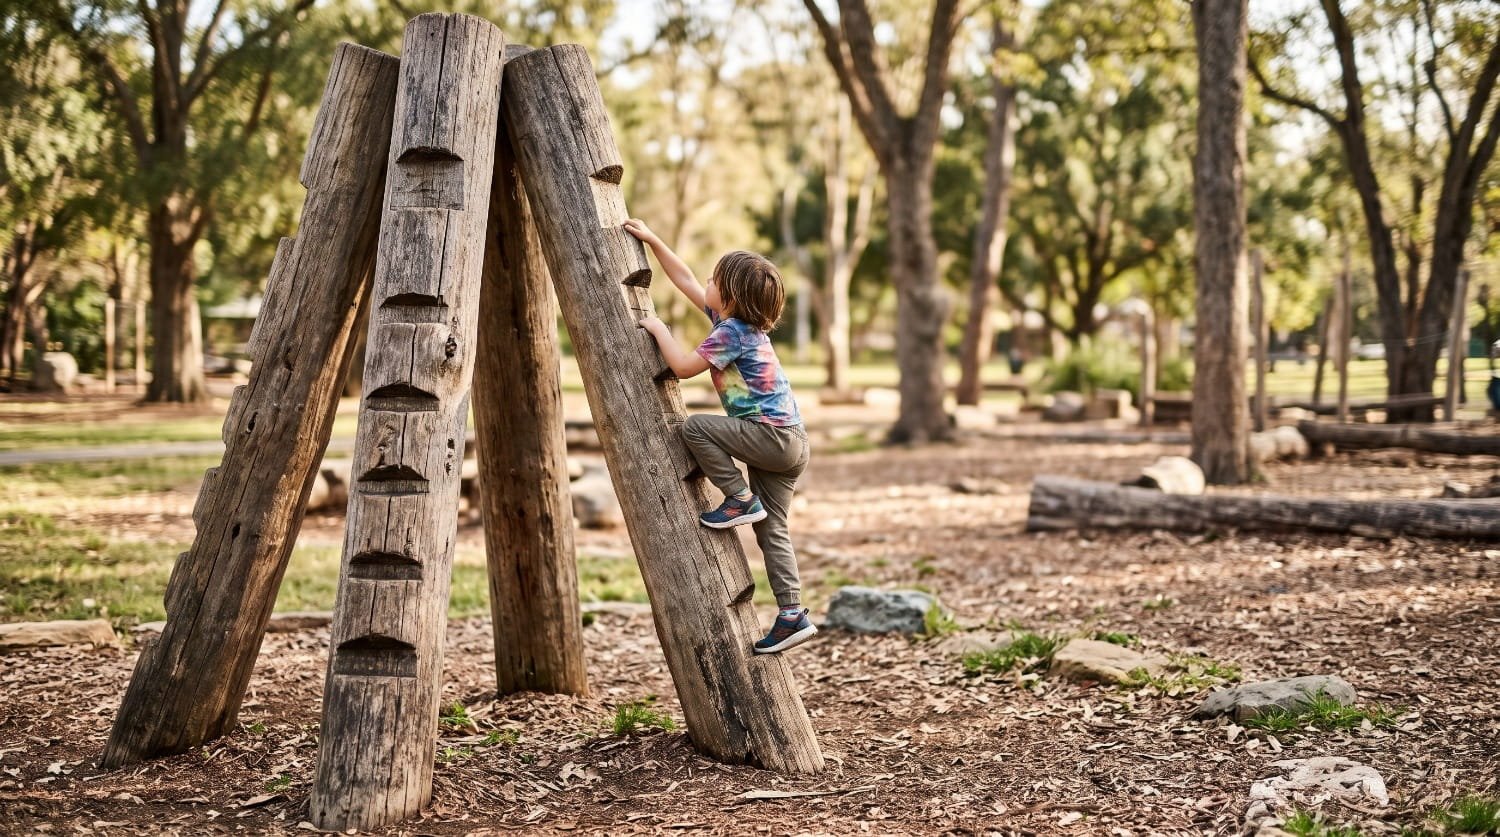
The vertical scaling stumps serve as the high-altitude centerpiece of your natural play area. This is where children will practice vertical climbing, pulling their own body weight up, and conquering heights. Because these logs stand tall, engineering them for total stability is the most critical safety step in this entire DIY project.
Sourcing and Sinking the Vertical Logs
You will need sturdy, thick pieces of wood for this. Source 4-to-5-foot tall vertical logs from your arborist. Do not attempt to use logs taller than this unless you are pouring concrete footings, as the leverage of a child climbing near the top can easily uproot a poorly secured post.
To ensure they never tip over, you must sink the vertical logs deep into the earth. The golden rule for vertical posts is that at least one-third of the total length of the wood must be buried underground. If your log is 4.5 feet tall (54 inches), you must dig a hole 18 inches deep.
Use a post hole digger or a shovel to dig straight down. Arrange the holes in a tight pyramid formation. Clustering three or four vertical logs close together allows children to step across the gaps and use the adjacent logs for extra handholds, making the climb much safer.
Drop the logs into the holes. Use a level to ensure they are plumb (standing perfectly straight). Do not just fill the hole with loose dirt. Fill the bottom few inches with crushed gravel to help water drain away from the bottom of the wood. Then, alternate between dumping in a few inches of dirt and aggressively tamping it down. Compacting the soil in layers is what gives the vertical log its rock-solid strength.
Carving Hand and Foot Notches
A smooth vertical log is nearly impossible for a child to climb. They need grip. Instead of screwing ugly plastic rock-climbing holds onto your beautiful natural wood, you will carve notches directly into the timber.
Before planting the logs, or while they are securely in the ground, use a wood chisel and a heavy hammer to carve 6-inch hand and foot notches up the sides of the wood. Space them organically so the child has to search for the next foothold.
When chiseling, angle the cut slightly inward toward the center of the log. This creates a deep, secure pocket that little fingers can curl into and the toes of sneakers can firmly rest upon. Once you have chiseled out the 6-inch notches, take your heavy-grit sandpaper and smooth the insides of the cuts. You want a firm edge for gripping, but no splinters.
Placing and Securing Heavy Boulders
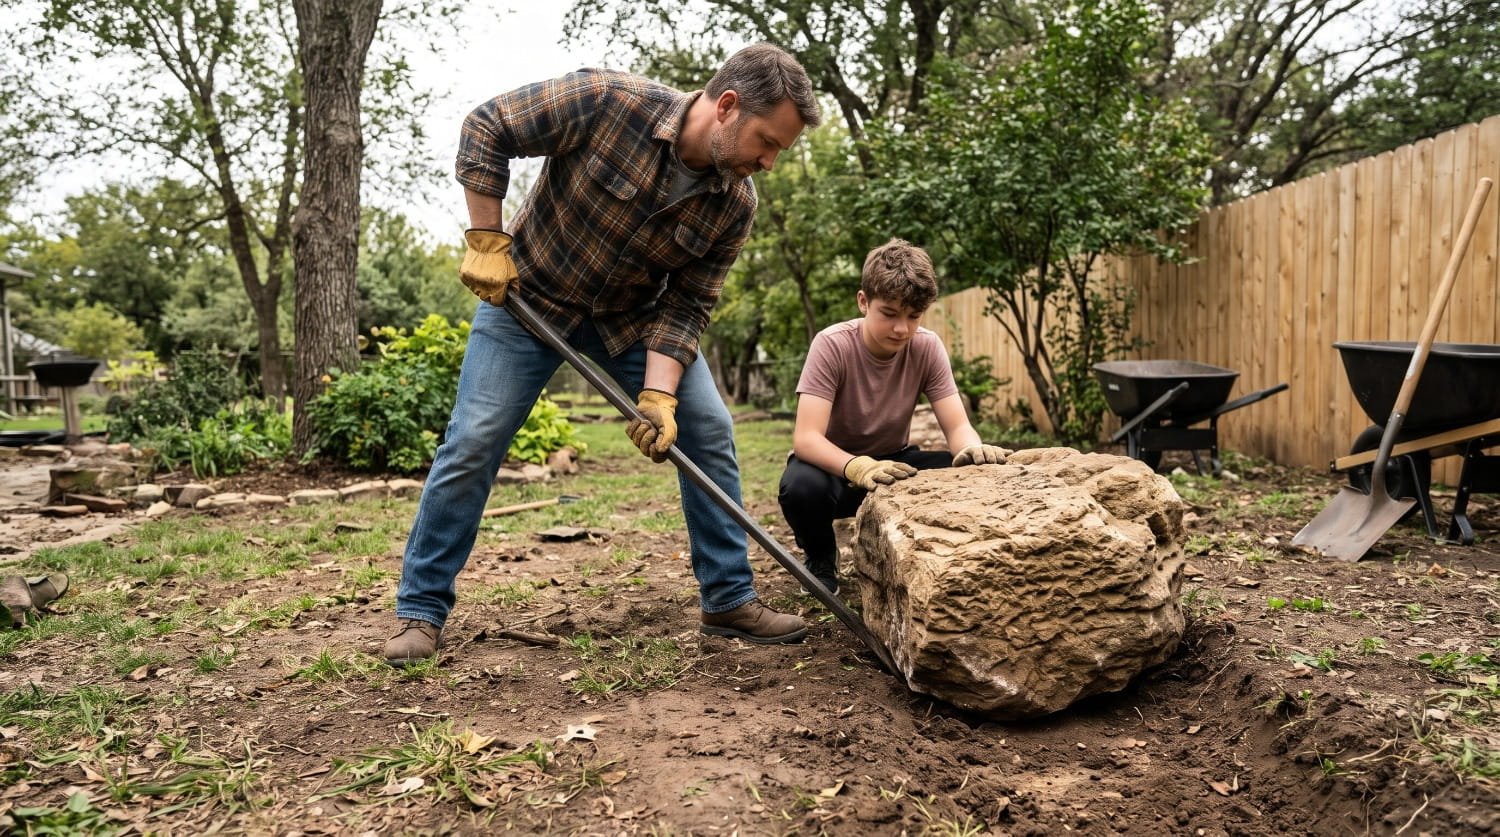
Boulders add a beautiful, rugged contrast to the wood elements. They absorb the heat of the sun, offering a warm place to sit on crisp autumn days, and present a totally different tactile climbing challenge.
Safety First When Moving Stone
Never attempt to deadlift a 200-pound sandstone or granite boulder with your lower back. Roll the boulder onto a heavy-duty hand truck or into a wheelbarrow using a steel pry bar as a lever. Move the stone slowly to the desired location.
Securing the Stone
Just like the wood, rocks can shift if the ground beneath them gets wet and muddy. A shifting boulder can trap a child’s foot. To lock the rock in place, do not just leave it sitting on the surface of the grass.
Evaluate the shape of the rock and find its widest, flattest side. This will be your base. Dig a shallow depression in the soil roughly the shape of the base, about 3 to 4 inches deep.
Use your pry bar to gently roll and leverage the boulder into the depression. Once it is seated, take the dirt you excavated, pack it around the base of the rock, and tamp it down hard. The buried base prevents the rock from ever tipping over, even if multiple children are standing on top of it.
Creating the Safety Fall Zone: Mulch and Ground Cover
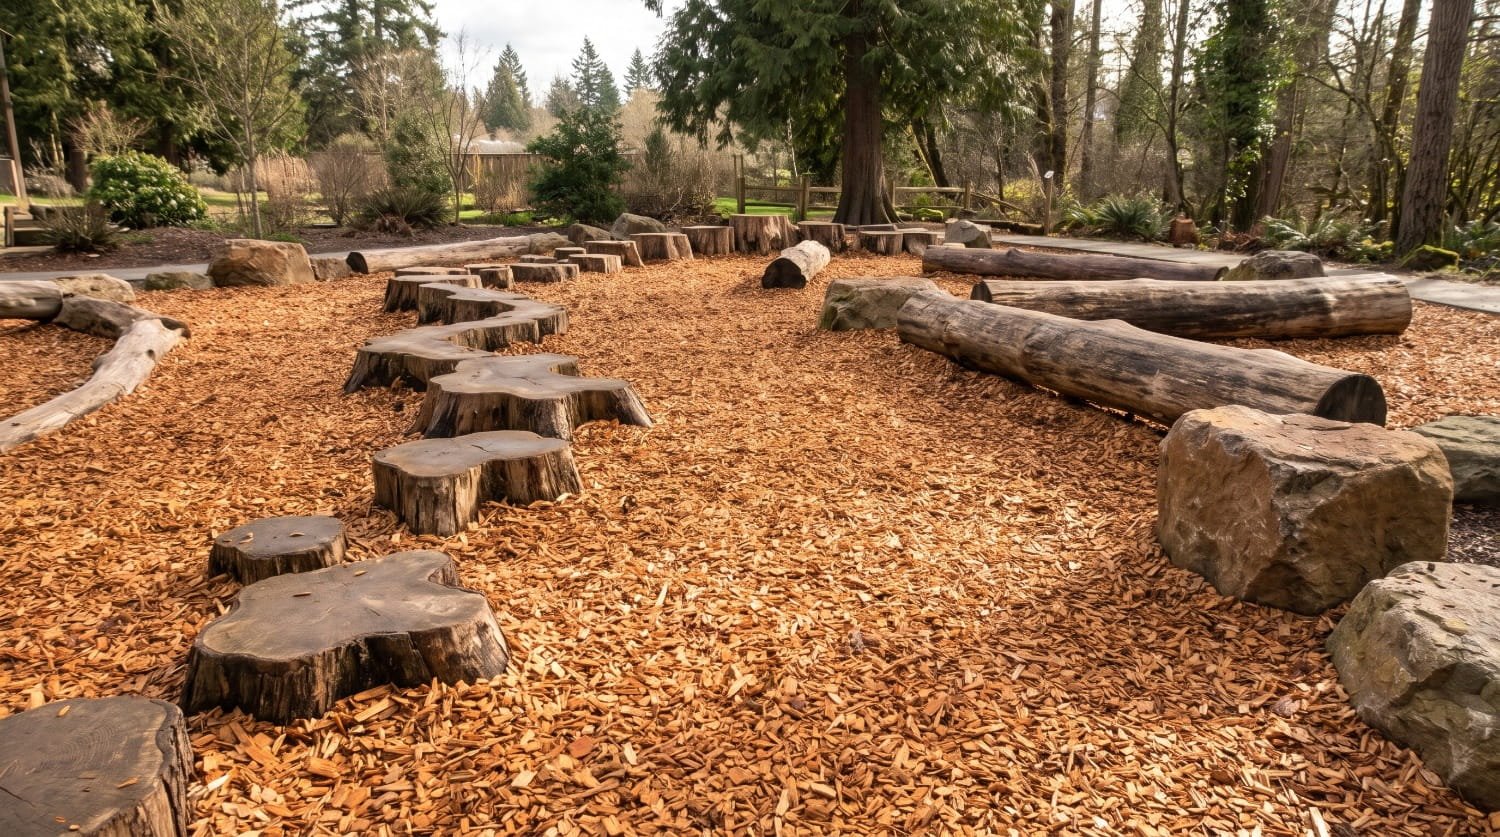
Once your logs are trenched, your winding stump stepping trails are tamped, your vertical scaling stumps are sunk, and your boulders are seated, the structural build is finished. Now, you must address ground safety.
Falling is a natural and necessary part of play. It teaches consequence and resilience. However, you want them falling onto a forgiving surface, not hard-packed clay or sparse, rocky grass.
You need to establish a dedicated fall zone around the entire play area. Use a shovel to edge a border around your natural playground. Inside this border, lay down a weed barrier fabric to prevent grass and thistles from growing up around your logs.
Next, order a bulk delivery of playground wood chips or engineered wood fiber (EWF). Do not use standard landscaping mulch, which is often chemically dyed and full of sharp sticks. Playground wood chips are tumbled to remove sharp edges and are specifically designed to absorb impact.
Spread a thick layer of wood chips around all the elements. The Consumer Product Safety Commission recommends a depth of 9 inches for public playgrounds, but for a low-height backyard DIY setup where the highest fall is typically under 3 feet, a tightly packed 4-to-6-inch layer of wood chips is usually sufficient to cushion falls and keep the area looking pristine.
Keep the wood chips pulled an inch away from the direct bases of the vertical logs to allow the wood to breathe and prevent premature rotting at the soil line.
Long-Term Maintenance of Your Natural Play Space
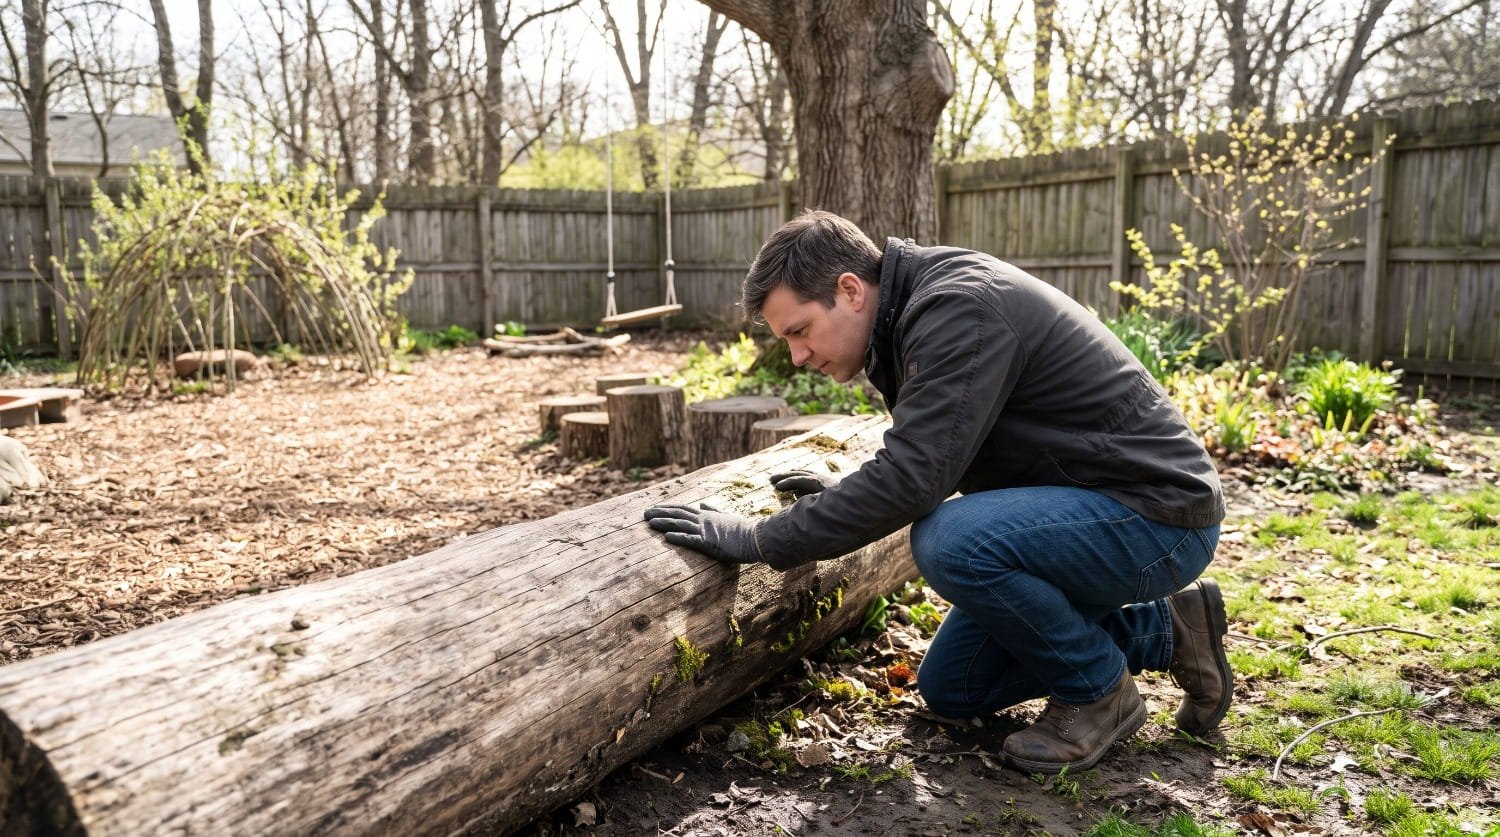
Plastic playgrounds rust, crack, and fade over time. Natural playgrounds age gracefully, weathering to a beautiful silvery-gray as they blend into your backyard ecosystem. However, organic materials require a different kind of annual maintenance to ensure they remain safe.
Annual Spring Inspections
Every spring, after the snow melts and the spring rains pass, do a full structural audit of the play space.
The Wiggle Test:
Walk the winding stump stepping trails and jump heavily on every single tree round. Check the horizontal balancing logs. Check the vertical scaling stumps.
If the winter freeze-and-thaw cycle has loosened the soil, use your dirt tamper to re-pack the earth around the loose elements.
The Splinter Check:
Wood expands and contracts with moisture and temperature changes. This natural movement can cause new cracks and splinters to form over the winter. Run your gloved hands over the top surfaces and inside the 6-inch hand and foot notches.
Keep your orbital sander handy and spend twenty minutes smoothing out any rough patches that have developed.
The Rot Assessment:
Untreated hardwood is incredibly resilient, but it will not last forever in the dirt. Check the base of your logs and stumps where the wood meets the soil. Press firmly with a screwdriver or a pry bar. If the wood feels spongy, soft, or crumbles away easily, the core has rotted.
It is time to dig out that specific stump and replace it with a fresh tree round from your local arborist. Typically, a good hardwood stump will give you anywhere from 3 to 7 years of solid play before it needs swapping.
Refreshing the Ground Cover
Wood chips break down over time, decomposing into dirt and losing their shock-absorbing qualities. Every two years, plan to have a few extra yards of fresh playground wood chips delivered. Rake the old chips flat and spread a fresh 3-inch layer on top to restore the bright color and the soft, springy cushion of the fall zone.
Bringing It All Together for Your Kids
Building a natural outdoor play space with logs, stumps, and boulders is one of the most rewarding weekend DIY projects a parent can take on. By sourcing free untreated hardwood, taking the time to properly trench and tamp horizontal logs, arranging tree rounds into winding paths, and sinking vertical scaling stumps deeply into the earth, you are building more than just a playground.
You are creating a rugged, beautiful landscape feature that will foster your children’s imagination, challenge their physical limitations, and provide countless hours of healthy, outdoor, unstructured play. Put on your work gloves, grab your shovel, and start building a backyard they will remember for the rest of their lives.